Friday, April 8, 2011

Our Day!

Wow, it's not even 10am yet and Roman and I have been incredibly busy!
Rain Catcher!
After I took the big kids to school and he woke up, we hurried outside to check our rain catcher (not exact by any means, he made it with a ruler and applesauce jar and I just wrote the numbers where he said to), since we got a lot of water last night well into this morning! He was so thrilled, he wanted to play with it and a funnel, but it's too chilly for water play today! (Idea for rain jar came from here!)
Counting Marshmallows, Building with them and creating shapes!
I knew a melt down was coming if I didn't think of something cooler than playing with the rain water, so I ushered him inside and decided today would be our Marshmallow Day! I pulled some out along with an egg carton and he got to counting them (up to 12) and then we decided to make shapes out of them (using a polygon shape page) and finally we he decided he wanted to build with them! He had so much fun, that this lasted over an hour! (Another blog post will go into these activities in more detail).
Magnet Play!!
I'm off to drive the carpool in a bit, but this afternoon, we are going to be working with magnets again and seeing if has retained any information from before! What's even more fun is that Gabriel has only morning class today, so he will be able to join us!!
Punching circles!!
Hopefully this weekend sometime, I can squeeze in a stop to the craft store for more craft punches! He's been using my circle 1.5 inch cutter and having a blast! I would love to get many more geometric shape cutters, so that he can make a shape book in the future! So many plans, so little time!!

We had an AMAZING nature hike and picnic after school today, I will share more in another posting in the upcoming week!!

What did you do today???

Craft in a Minute!

 
You Need:
Scissors, Crayons, BLACK Duct Tape, Box
I am forever getting packages in the mail and looking for creative ways to use the boxes. Today after Roman and I gave the water table a good scrub down and waited for it to dry, I decided to start something new! I am putting together a busy bag to keep handy everywhere we go and I like practical everyday things for our bags that can easily be replaced if lost or broken!
I took 1small box and scissors, BLACK duct tape, white crayon and got to work!
First I cut the box apart at all the creases and then put tape on the pieces anywhere we wanted, then I handed Roman the white crayon and he dotted the roads! ALL SET! A match box road that can easily be moved and switched around, since there are so many pieces!!

Roman having a blast with just one part!!
He played for an hour when I first finished and after school when he showed Gabriel, they played for HOURS!! On cardboard and tape! Best part? If it gets broken it's no big deal we can make more!! I love sharing crafts with the kids that cost next to nothing to make and showing them just how much they can enjoy them!

Gabriel joins in on the fun!!
I am hoping to do one of these in a shoe box, with velcro sides that fold down and then they can add the extensions still the box can hold the cars, some houses and trees and signs and the extension pieces! I will then add a handle to make it portable. This is our next project when we get a bigger box around! My supplies always comes in tiny boxes.
Tape can be found at Michaels for under 4.00, go to ww.mycraftcoupons.com and get a 40% off coupon for the tape! Save more!!


*NOTE* We tried chalk, but it just wore off with use, which is why we went with crayon!

Thursday, April 7, 2011

Thrifty and Easy Sand Box on the Go!

 Roman and I were dying to get out and play in this perfect weather, yet it was too chilly to be at the water table and I didn't want to start on the garden without the big kids there. We put our thinking caps on while sitting on the grass waiting for Gabriel to get out of school and came up with a fantastic idea, SAND!!
 Let's backtrack and talk about the big sandbox that the kids could fit in from last year (Step2) it was nice and luxurious, but the kids were always all sandy when they came in and it was a pain when they wanted to play quick and we had places to go. I wanted something EASY and Portable that could come with us when we went to grandparents homes and other visits where they get bored or antsy after 10 minutes of sitting there staring at eachother!
First, I had a large under bed storage container that was just sitting around empty. (Sal got it at the Salvation Army when he went and donated items, a man asked if he wanted to trade bins with him! haha) Next, a trip to Menards got us 2 bags of sand and random pieces that I found while strolling up and down the aisles! (toys can be made from ANYTHING!!) Finally I poured in the sand and tossed in the toys and we were ready to party!! I like this, because we can only use 1 half if that's all we want to play in OR the entire lid comes off! It's also on the wheels to make it easier for the kids to wheel around the back patio if they want to move it out of the way.

Easter Egg Counting

 
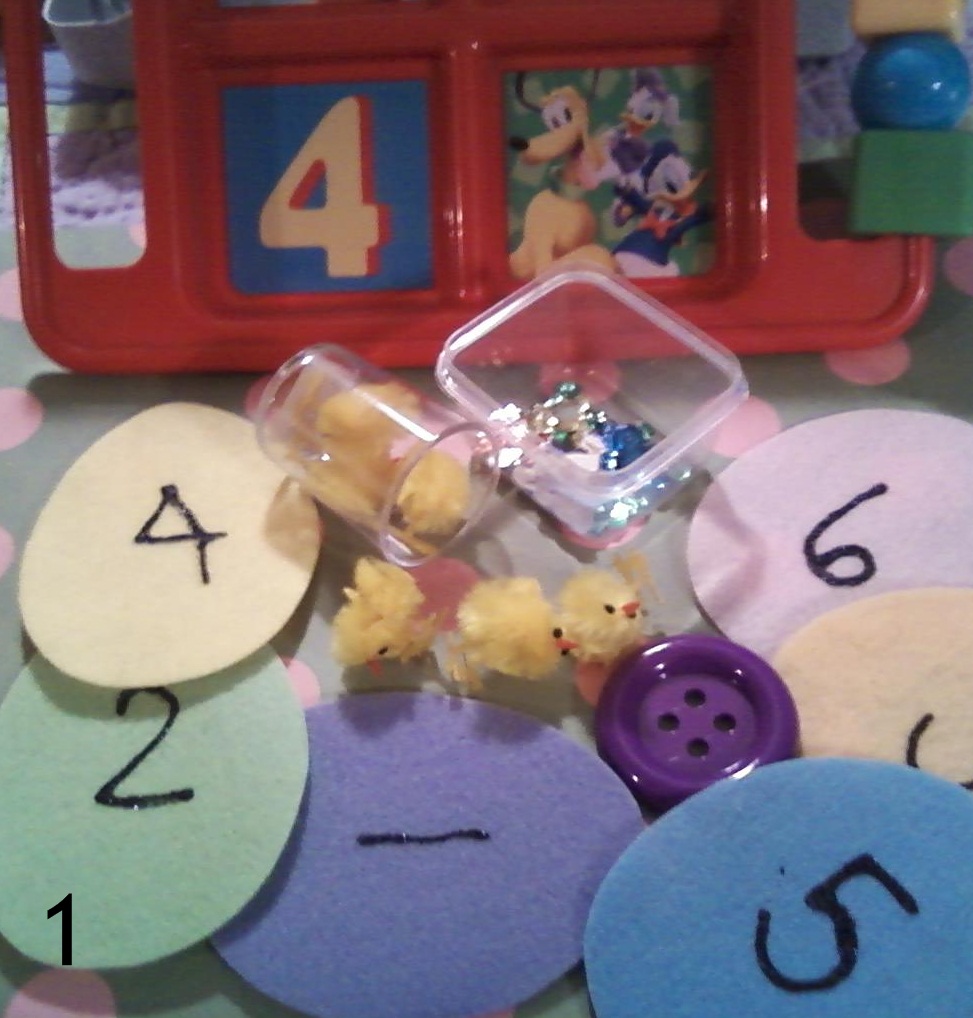
 We had some felt scraps that were dying to be given a new life, so we got busy! We cut them into egg shapes and used black puff paint to put numbers onto the eggs! Since this is a game for my 3 year old, we just went up to number 10 right now and only use them a little bit at a time, so as not to overwhelm him.
 I start out round one with the eggs in order, but gradually mix them up as the game progresses!
Roman then uses buttons on each egg. 1 button on the number one, 2 buttons on the number 2 and so on and so forth. Sometimes we play a game where I say put a red button on number 3 and he will do that instead. We try to change it up each time we play!! Share your Easter themed crafts!!

Linked up at:

Wednesday, April 6, 2011

Expired Box Tops?

I've been trying to make up a small index card size note to tuck into the Summer Box Top bag (Post and photo coming soon) that would show the official box top label and also assist parents in differentiating the campbells soup label from the Box Top. I wanted to be sure they checked the expiration date (we have A LOT expiring June 1st) too! Hope this works! I plan on putting a Box Top magnet on the other side of the index card as well!

Busy Bag!

 We are on the road A LOT! We rarely if ever spend a weekend at home and with 3 kids in 3 different schools, activities, meetings etc. there is always something going on somewhere! Being constantly on the go means a lot of offices, restaurants, waiting and quiet time, so I developed a small bag that would keep them quietly busy while we are on the go!
While everything you see here really does all fit well into this bag, I only like to keep 6 things at most in here at a time and usually not all that much. It makes them appreciate each and every game and get really into it too!
 My 3 year old likes to now carry his own treat bags and backpacks, so I knew the new busy bag had to be his size! This is an old Fisher Price toy bag that we used to keep in the van when our daughter was a baby! It's finally found a new home. The following items, I don't discuss in detail, so I will just touch on them now. Clothespins are ALWAYS a fun activity no matter where they are, so I threw a couple of those in, along with some Ziploc baggies (always needed for something or other!), wipes and a reusable juice box round up the random bits that are in here!
 1. Our Felt Easter Eggs Counting game. This is a fun game that I will go into more detail in tomorrow's post! I added baby chick and rhinestone counters too! These are fun alone or with the game, as I also included a sorting tray to turn 1 game into many more.
 2. Our craft in a minute coming this Friday is another must have in our busy bag! This is just cardboard pieces of 'road' that the kids piece together in multiple ways that always seems to make play last forever! There are 3 cars that we keep in here that I change out periodically, to make it more new and fun each time! Once in awhile I will add a new piece of road too.
 3.Button Snakes kit!These fun kits are such a blast to work with that all 3 kids often want to start with this! The buttons serve multiple purposes in this bag too!
4. A fun notebook, pencil, crayons and drawing direction die! I will touch on the die in a future craft in a minute post, but for now, I will tell you that this is definitely one of their favorite games to play while waiting in a restaurant. The person whose turn it is throws the die and then has to draw whatever comes up on top, the next person has to start where that person left off, drawing what they in turn roll. It's a super easy game, that gets crazier when the page starts getting really full! We like that even the youngest one in the family can get really into it.
 5. Caps Caps Caps! These fun caps are fun for word play! We like to spell out easy words and then pass the word to the next person where they can then add a letter or subtract a letter to form a new word! This one gets really entertaining!
6. Wrap Up Games. I found these awesome Wrap Up games on clearance at our local teacher store! There are 12 of them for only 3.00!! I couldn't believe it, I wish there had been more than 1 as these would have made an awesome giveaway or even gift in an educational basket. They start out very easy and get more difficult as you get to the 12th card. They are a very sturdy plastic and hold up well to play.
7. Memory, Story Dice and Hourglass. These are fun things that are so tiny, they can fit in a pocket if need be! The Memory Game was something we all had a blast making on a crafty afternoon and when the big kids play, because it's so easy, we add in an hourglass! The hourglass alone is also fun for watching and thinking of other games to play with it! We also love our story die, you roll it and start the story with what lands on top! Another craft-in-a-minute activity that was too fun for words that it instantly went onto our list of DIY gifts! We plan on making up one big basket full of our DIY activities very soon for 1 lucky winner! That will be coming up in the future! For now snag yourself a memory game!! 
8. Did you know that 3ft of yarn can be a blast for 3 kids? Neither did I, I put these 2 spools in here with 1 full of yarn for my son to unravel as he raveled it back up on the empty one. While that is a good game, they discovered that they could make 'bridges' for the clothespins, make shapes from tying one end to something and then wrapping it around somewhere else and on and on it goes!

9. Nuts and Bolts! I touch this later on this week, but a simple activity is so fun for everyone! (yup, even mom gets in on this one!!) they love to see who can screw on the most nuts onto 1 bolt the fastest, or  how many they can put onto all the bolts before the hourglass is up. These are just perfect everywhere and for all! (You can buy larger bolts and nuts if you worry about the size, but this is just right for my 3).

10. Topple Pieces. Our Topple game has loads of pieces (have you read my thrifty post?), so I knew I could snag away a bunch and they would go unnoticed. I have 30 of these that sit in their own little drawstring pouch and the kids try and see how many they can stack before they fall, who can stack 10 the fastest, how many they can stack before the hourglass time is up...etc. Fun in a pouch!
11. Number flashcards. Just a fun way to go through the numbers! Every other card has a chipboard number on it and the card following it has the matching amount of stickers. We take them off the ring, for a quick matching game sometimes.
12. Easter Alphabet Game! This fun game is very versatile and can be played so many ways too!!

Linked Up Here


Hope you liked your journey into our busy bag!!

Tuesday, April 5, 2011

Box Tops used for EDUCATION!

 I'm in the middle of counting up some more Box Tops, because many have that pesky June expiration date! I'm hoping to get them in the mail this week and decided to get my 3 kids involved in the long process! I decided to really turn this into a TRUE educational Box Tops experience! As I cut them down to the perfect square (saves on postage you know!) and put them in our Box Tops purple bucket! I got the younger 2 involved in another way!
My younger 2 are learning to count to 100, so we pulled out our hundreds chart and I gave them the purple bucket of Box Tops that we had cut down already and they placed them on the numbers 1-100! I colored the 50 box and told them when they reached there, they popped them in a bag and continued on. My oldest daughter already knows how to count to 100, so she would take the sealed bags from the boys and double check the count and make sure there were 50 in there! A fun way to teach and get stuff done, all while hanging out together!


As we worked this evening, we had Bach on the radio!

My Spin and Spell!

 I wanted to make my kids some fun spellers that they could build their word vocabulary with and went through many ideas. I wanted a more industrial chic look that could be modern and fun. I started at the hardware store with a rough idea of what I wanted in my head.

I rummaged through my craft supplies for rub on letters from Michaels .99 and my Mod Podge
I added these supplies to what I picked up from the hardware store (5 hex nuts, 1 carriage bolt and 1 lock nut). Make sure that your hex nuts are larger than your bolt so that they slide as opposed to screw up and down the bolt. This makes them easier to turn, the more nuts you add on.
I added the letters onto each side of the nuts and then put the mod podge on top of them to adhere them to the nut. Since my kids are at different vocabulary levels, I knew I needed to make it a game that they all could play! This was perfect! They could easily play the game with 2,3,4 and 5 letters (Just add or take away the nuts as needed) and when they think they've spelled them all, take them all out and mix around the order!!

For my youngest, I go down to 3 letters at times when he is learning new words and sometimes we just use 1 letter and  I have him find the letters that I ask for, that way he gets a better understanding of letters. This is a game that we have all gotten into and tucks away easily into a busy bag or even my purse!! I've made about 12 different nuts of letters and we have 5 bolts so that there can be multiple games going on at once and the letters can be switched up often.


LETTERS USED:
For beginning readers try
F, L, M, N, R, S on the first hex
A, E, I, O, U, R on the middle one
B, D, G, P, T, S on the last one
For 150 pronounceable combinations

For More advanced combinations:
4th: s,t,e,d,r,n
5th: t,h,d,e,y,n


Linked Up:

Monday, April 4, 2011

Easter Alphabet Game!

This fun Easter craft was an easy project for my 3 kids and I to do together in 1 afternoon! It's a fun game that can be used multiple ways!


You will need:
~Scissors
~Alphabet Stickers (or really neat handwriting!)
~Card Stock

First, I printed out eggs on card stock (3 different sheets) and handed the scissors to my 6 and 5 year olds so they could get to work cutting them out (great practice for cutting on the lines).

As they were being cut out, my 3 year old and I stuck the letter stickers on them in a pattern. First I had him create the pattern using the 3 different papers and then we played eye-spy in order to find the letters we needed (I spy a P) and stuck them on! All Done!!

Games We Can Play:
1. Pattern Practice! We can organize the eggs by patterns, ignoring the letters on them.


2. Alphabet order! We can put them in alphabetical order.

3. Word Play! We can spell easy sight words
4. Clothespin Match Up! We made these eggs with lower case letters, so that they could be matched up to our upper case letter clothespin game!


Enjoy and link to your Easter Crafts!


I'm Linked up over here:

Sunday, April 3, 2011

This Week in Photos!


When making my daughter's Bento lunch, I always like to create an appropriate card for what activity she has going on after school! This days lunch was on Monday, when she has Chinese class after school. I wrote I LOVE YOU in Chinese! On her art class day, I usually draw a photo for her or on Science Club day, I have to really get creative and this week just made her lunch note in the shape of a beaker with a science fact in it. Thursday is Ballet, so I tucked a little ballerina cupcake pick into her cheese cubes and Friday brings the weekend, so I made sure to have Daddy write her note, so she knew that he would be with us all weekend long (no work on the weekends!!)


Finishing up the plane tickets for our trip around the world! We are getting so excited to learn about places that we have never been and to 'revisit' places we have been!!

Hello old friends!! Time to dust off my gym shoes again! The weather is getting warmer and my mother signed us up for the Chicago Marathon in October! WOW! I have a lot to do to get in that kind of shape!! I'm thinking of hiring a personal trainer, but still not sure! YIKES!

Saturday, April 2, 2011

Easy Memory Game and GIVEAWAY!!

  After finding a wonderful bulletin board border at our teacher store, I used the parts I needed for our chore chart and got to thinking as to what I could do with the leftovers! My youngest is 3 and can never keep up when we play memory with the big kids, so I thought these pieces would be PERFECT for a mini memory game to help build up his memorization skills!! I cut them down to a mini 10 piece game.
He had such a blast playing and the smile on his face when he would match one was so big it melted my heart!!!
He even liked matching them up when they were right side up!! This was a game that he has played over and over again and even his brother and sister get involved when we play at a restaurant and the food takes a little long to come! (Usually breakfast on Sunday after Mass when the places are so full!!)


We had some awesome little envelopes that I have been dying to use with something (I got a case of over 1000 of them for .99 at the Salvation Army!! We used scrap paper and flashcard pieces with some stickers to decorate them and they are so cute!! We gave a few away to his friends in our playgroup and still have some left over!

Want to win one of these awesomely fun little games?? Just follow my blog AND leave a comment with your email address.

Please share a crafty tip if you have one! This giveaway is open until April 20th! Share the link with your friends! We have 5 sets to give away!!
Related Posts Plugin for WordPress, Blogger...