Thursday, December 29, 2011

Thrifty Thursday!

While out on a coffee run, we stopped at a local charity shop and got quite lucky! We found this COMPLETE set of Melissa & Doug Dino Stamps set for .99! The original colored pencils were missing, but were replaced with a FULL set of CRAYOLA colored pencils! Of course the children all grabbed for those first when we sat down to work!
Combined with our Dinosaur coloring and informational books that they got for Christmas, it was a few hours of time well spent. As they stamped, they would ask what kind of dinosaur it was and someone else would look it up.

 The 2 big kids would take turns reading about that dinosaur and then they would draw appropriate surroundings!
Anything that keeps them playing together quietly and learning something new is something that gets an A+ from Mom, add in the simple fact that it was only .99 & we helped out a charity shop at the same time makes this 1.00 well spent! How are you spending thrifty thursday?

Have You Added Me Yet?


Photobucket

Tuesday, December 27, 2011

File Folder Fun!

One thing we love are File Folders! I like to trim them down and then slip them in to a page protector. Once in the protector, they can then be put in our Busy Binder!

1. I took a bulletin board border and cut out the cars. 
2. I put random numbers on the cars to look like race cars.
3. I wrote out matching numbers onto the file folder to look like parking spaces.
Now the kids can park the cars all while learning numerical and spelled out numbers.

The front page of the file folder holds an envelope where all the cars are permanently parked and stored! Simple and fun and a very quiet activity!


Photobucket

Thursday, December 22, 2011

Delightful December Day 11! Box Fun??

Kids are born naturally AWESOME, don't you agree? They have ideas and thoughts and the best of intentions, it's us adults that get in the way by telling them this way and that. Sometimes I have to remind myself to step back and let them be! With the Holiday season in full swing and the kids home 24 hours a day + the husband on vacation, it was time to get SERIOUS and hit SAM'S Club! 
As many of you know, a trip to Sam's always results in a plethora of boxes! Boxes for everything that anyone can think of, sizes, shapes, colors etc. We grab the largest ones without thought at all, but the kids had something else in mind. They told us that they would be in charge of the boxes and quickly ran to grab what we needed. When we got home and my husband was tossing the boxes to the recycle bin, they STOPPED HIM! No DADDDDDDYYYY!!! Don't throw those away we can DO SOMETHING WITH THEM! They opted to skip Mom's craft of the day and create on their own!

Isn't it amazing how a simple and ordinary cardboard box can turn in to a rocket ship with nothing done to it at all? It can become a playhouse complete with santa stickers, as you can see in the background left there! It became a boat, race car (where they played Wii Mario Kart from!), shopping cart, stroller, toy carrier and on and on the play went for hours.

Near the end of the evening, I noticed that the youngest snagged this oddly shaped box and created a village backdrop on it! He glued blue paper, strung some lights and taped down green paper to the floor. He dres flowers and snowmen and had the best time playing on his own! I love when kids are left to their own devices and come up with some pretty amazing stuff!


Photobucket

Wednesday, December 21, 2011

Almost Wordless...

Go Cowboy!

Yay, we can check out our own books!

Playing together!

 ACTUAL display in our neighborhood for Christmas

Photobucket

Tuesday, December 20, 2011

Make it Shimmer with your own Glitter!

Over at our house, creating in the kitchen is an awesome experience, no matter what's cooking. Yesterday, we decided to try our hand at making our own glitter. We were excited at the prospect of having many different colors of dinner, on hand at a moments notice! Pre-Heat your oven to 325*. First you pour salt in to a bowl (however much glitter you want). Add a few drops of food coloring and mix it all up. Make sure that the color takes over all of the salt you use. Pour onto a baking sheet in a THIN layer.

Bake your salt on TINFOIL in the oven for 8 minutes and then let cool. If you see larger clumps of salt, use the back of a spoon to break it all down. I let it all cool for about 5 minutes, so that I could pour it into smaller containers that stack for storage.

Overall, I was quite let down with how dull it all turned out. It's basically colored salt and NOT glitter. The shine that my pink glitter has taken, came from a mixture of the colored salts and a TINY sprinkling os silver glitter. The purple seems a bit shiny, because instead of ordinary table salt like on the left, I used Sea Salt. That helped a little bit more and also seems to adhere better with glue. 
We used the glitter to decorate our Mr. Potato heads! All in all I was the most disappointed. I was hoping for a miracle way of making glitter, but in the end all we got was colored salt. The kids? THRILLED beyond words that they could play in the kitchen and create something so fun. They almost used everything we made and are already begging to make more so that they can bring some to their art teacher!

Have You Added Me Yet?


Photobucket

Monday, December 19, 2011

Menu Plan Monday! Let's talk about Kids and Food...

Christmas break has already thrown me off! I cannot believe how quickly the weekend flew on in to Monday.   My lucky kids are all on break this week, so we enjoyed sunday by staying out very late at the movies and not getting home until midnight! YIKES!! I hope your weekend was just as enjoyable.

Do you ever notice that a few cupcake picks and child sized portions can change a child's attitude toward eating? I chop things up tiny and put them in portion sized containers, add in some decorative flair and I never have a problem with my kids eating!

How about produce? Ever notice that it will sit and mold if you leave it in your fridge as it came from the Market? The minute I slice it up and put it into small, serving sized containers it's all gone. The very second I sit with a plate of fresh fruit salad, little hands reach in to take it all away piece by piece!
Moving on to the Menu! I'm attempting to keep all the meals kid-helper friendly, so that the littles can help me in the kitchen! Usually they are doing homework while I cook, but we are planning on changing it up a bit this week and doing homework in the morning.

Monday: Chicken Alfredo with a Garden Salad
Tuesday: Vegetable Alphabet Soup & Sandwich Bar
Wednesday: Chicken Pot Pie with Fresh Baked Bread
Thursday: Cheese Enchiladas with Rice & Beans
Friday-Sunday: We are out for the Holidays eating with Family & Friends!

Enjoy your week my friends!

Have You Added Me Yet?


Photobucket

Saturday, December 17, 2011

Delightful December day 10! New Park and 1st day of break!

Christmas break is officially here and we couldn't be happier! Why not start off our break with a visit to the new neighborhood park! This is a climbing park, which offers the BEST work out for mom and dad and burns off so much energy for children!! This climbing park also offers a couple of the standard park features like slides and some swings, but it is primarily geared towards things children can climb! (That's even the only way to get up to the slides!!). 

Our favorite features were the climbing rocks! They had them for all abilities and sizes, though that didn't help me out, since I got scared at the top of one mountain and had to have my husband help me down (okay he helped me get halfway down and then just picked up up!!! haha).

The 'helicopter' mom in me, had me terrified of all the climbing, but the kids had so much fun! They had races, challenges and even put together an obstacle course!

With 3 slides, this meant that all 3 kids could race! They started down low and got up to the top in any way they chose. Slid down fast and then back up again and back DOWN again, but NOT using the slides. The 2 boys chose the same way down! Mommy was of course scared, but there was Daddy cheering them on!LOL!

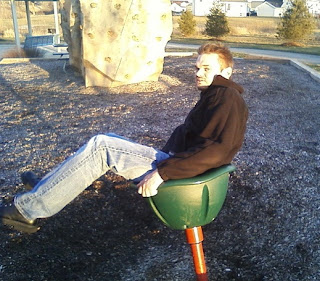
This spinning contraption had EVERYONE wanting to take a turn and having so much fun that no one could even stand up afterwards! I thought for sure someone was going to throw up, but needless to say they all just wanted more and more!
I did say EVERYBODY wanted a turn, right???


Our Princess was the one that really took to the rocks well! She had so much fun going up to the top and then trying to get back down again. Autumn got so confident that she even asked Daddy for a race to the top! All in all an awesome experience that had us all NOT wanting to leave, but the sunset and cold weather also had us glad to be close to home!
Linked Up at:


Photobucket

Friday, December 16, 2011

Delightful December Day 9! The Kindness Tree...

Wow, where has this month gone? We are over halfway through December and I feel as though it has just begun! The Holiday Season is a time where we share our love with others more than any other time of year. I would like to say that we do this year round and should always be mindful of others, but of course it always gets pushed by the wayside. We are hoping to change that and make ourselves more charitable throughout the year. 

I figured a good way of doing this, is by letting the children recognize when another child is being kind or charitable towards one of them or another person. We created our kindness tree. I gave them a large green poster board and colorful card stock and had them cut out a Christmas Tree, Star & Ornaments. It may not be perfect, but I am proud nonetheless that they were able to work together to create something so meaningful.

The idea is that for every good deed or charitable act that a child does or is seen doing they can write it on a piece of paper and stick it on to one of the ornaments. 
With each passing week we will count up and read the good deeds to see who has made the biggest impact and that child will get to pick one of the 'present' stickers on the stump of the tree. Each present has a number on it and that number coincides to an activity or special time with a parent that they get to enjoy. We hope this helps the children become more aware of the impact that their actions have on people around them.

Have You Added Me Yet?


Photobucket

Thursday, December 15, 2011

Delightful December day 8! Christmas Card Creations...

Wow, I cannot believe that Christmas is practically here! I have been trying to keep up with our daily crafting, but I do not like to post more than 1 post a day on my blog. Looks like all of our December crafts may go in to January! Today, I would like to tell you all about our Christmas cards. We joined an awesome Christmas Card Exchange, hosted by THE TOY BOX YEARS! I signed up my children and before I knew it, it was time to get them made up and mailed out! I started by gathering art supplies of all kinds, because I knew we wanted to make our own cards.

I cut down postcards from thick card stock and gave the kids stickers to decorate any way they wish! All 3 of my children had an absolutely wonderful time doing this. Next, it was time to write to all the kids that would be getting our postcards. We sat and wrote down what we wanted to say, but since everyone's handwriting (including Mommy's) was too big, we typed it up and printed it out! The children LOVED getting to glue down the notes and addresses as well.

The best part was still to come! The letters began to trickle in as the days passed and everyone was THRILLED to be getting mail. My husband even mentioned that in ONE day, he thought the kids got more Christmas cards than he had gotten in his entire life!

With each card that would arrive, we would map out where that card arrived from. We have received cards from AUSTRALIA and ASIA! How amazing is that?! Marking on our USA and WORLD maps has been such an experience for the little ones and for Mommy too. We love learning all about kids around the World and in different states around the Country.

After mapping out where these cards all traveled from, we would punch a hole in the top of the cards and slip them on a binder ring. All our cards can now be flipped through and kept in one place neatly! If the card had a return address on it, we snip it out and glue it to the back of the card, so that we always know where it came from! This has been an awesome experience all around!

Have You Added Me Yet?


Photobucket

Wednesday, December 14, 2011

Wordless...

It's one of those days!

Welcome to all my new followers!

Photobucket
Related Posts Plugin for WordPress, Blogger...