Thursday, February 26, 2015

How to Prepare for your Disney Trip!

You're going to Disney!!! Congrats and be prepared for the trip of a lifetime. In order to make Disney affordable, we book a year in advance (in fact we book while we are still on Disney Property!!) and pay it off monthly. Doing this means our trip is SO FAR AWAY, but it also makes for some awesome things we can do as a countdown!! Disney sends you packets of information from booking all the way up to your trip, which is awesome when you have little ones! We love yelling DISNEY MAIL!!! Then everyone gathers and we open it all together. This is a fun way to count down to Disney, not the mundane 'what to pack' type of posts. You can find those anywhere and for us, packing is the least of our worries! LOL!
Once you book your trip, QUICKLY order the current DVD planning video. Yes, you have already booked your vacation, but this video is PERFECT for getting you all in the Disney mood and you can watch it often. It's important to arrange for Disney Mail to arrive at least once every 3 weeks or so, so that the countdown seems real. If a few things arrive at once, save some for another week to keep the suspense. Onve we get down to 2 months before we head out, I usually have enough for once a week DISNEY MAIL packages!
Head on over to Your Disney Side and create your own decal! Let your children each create themselves, so that it becomes a fun fun family activity and once again more Disney Mail to look forward to!
Get your guide book on! Many libraries carry these guide books, but we like to buy our own so that we can write in them, fold pages and constantly refer to them. We usually pick one up every month as a countdown to our trip. Many can be used year after year and others that are dated, we just cut out for our scrapbooks when we get back or hand them over to friends that are headed there next. Some of these books like Hidden Mickey's are AWESOME for bringing with you on vacation, because they will keep you and kids occupied while in lines and during down times. Order them online and you have more Disney mail arriving at your house. Start with planning guides far in advance and work your way towards dining guides when it's time to book your dining reservations (180 days). Work your way to Trivia, Engineering and specialty guides as you get closer and then be sure you have your Planning Guide ready and marked up to book your Fastpass + reservations (60 days).
Next, head on over to the WDW website and it's time to create your own park maps. Be sure to have your park guides with you so that you all can discuss rides and you can be sure that everyone meets the height requirements. This part is a lot of fun, we usually do this with dessert one evening around the dining room table. These usually arrive within 3-4 weeks but have sometimes arrived in 2 weeks, I guess it all depends on how much they have going on at that time!
Now it's time to head on over to EBAY and order your pin trading lanyards. No only are you saving money by doing this on Ebay and NOT at the parks, but you are adding to the fun of the trip. Disney sends awesome luggage tags with your Magical Express information, but if you don't need that many,  let the kids put those on the bottom of the lanyard and they will also have your cell phone # on them in case of a worst case scenario. Another option is to let your children put their spending money on a Disney gift card and put that on the bottom of the lanyard, that way it is always with them. Now it's time to begin buying a handful of pins for each lanyard. Keep these pins to hand out on weeks that you have no Disney Mail coming and don't do them all at once, it makes it more fun for them to add as they go.
When it comes to Disney Pins, why spend top dollar on ones your children are just going to trade anyway, especially when you don't want to influence what they trade for.  When buying from Ebay, be sure they are OFFICIAL Disney Trading pins ONLY! They will be marked on the back that way, you don't want cheap pins that the cast members will NOT trade for as it is. Pin trading keeps the kids engaged and having fun, without any additional monies being spent while in the parks. We usually then let the kids pick out one special non-tradeable pin in the parks. All the pins hit our shadow boxes at home once we get back from our trip.
Before you know it, it's time to go and THE DISNEY PACKAGE arrives. This is the one with your Magic Bands and you are now READY TO GO! Before these arrive, there are a few more things you can do to prepare for them! On Ebay, you can find a plethora of Bandits and Coverbands. These are things to decorate your Magic Band with. Let me inform you that if you WANT these items, to get them through Ebay and do not pay a lot for them. We lost so many bandits, I am glad I didn't pay full price for all of them. They pop off easily, so be sure to use E-6000 glue to glue them in place once you have sized the bands. This will go towards saving your sanity. The coverbands are a complete waste of money, the bands slide around non-stop and you can't always get a good connection with the wand when you are entering the park or using a fast pass. Of course, you are then holding up the line while you try and fish the band around. Disney claims that they can read through the material and for the most part they can but every now and then (usually with the longest line behind you), they don't. All of these fun little gadgets and do-dads help the time go by so much faster and add more levels of excitement that also lead you to save money when in the parks. You aren't spending on extras and your trivia guides give you something to do instead of wandering into the shops! We attempt to do Disney once a year and follow this plan as much as we can. Our break in our streak came when we bought the house and we had to put 2 years on hold and now we are preparing for a 3 week stint in Mexico next year and Europe the year after. 
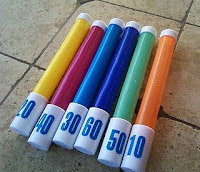
While waiting for that last week to DRAG BY....head on over to your local drug store and pick up some glow in the dark polish, glitter polish, favorite color and then a base and topcoat. Now you are ready to decorate your magic bands! We kept it simple by just painting the mickey head (this does not affect how it works AT ALL) with glitter polish and then the entire thing in glow in the dark polish. This is awesome in the evening and even better in dark rides and shows. The kids loved this part the most. You will need around 4-5 coats to get the most out of the glow polish.
How true! I always hear about how people think their children are too old or too young for Disney but this is just not true. My kids have gone as young as 2 months old and I was still going with my parents through college! Disney has no age restrictions on Magic and that is exactly what a trip to Disney is!

Photobucket
   Follow Me On Facebook!
   Follow Me On Pinterest!

Wednesday, February 25, 2015

Wordless on Wednesday...

Disney obsession is something we just can't quit!
Get creative with your snacks! Green twizzler grass, pretzel stick tree trunk, mandarin orange palm tree...

Playing Charades as a family
Enjoy every minute my friends!


Photobucket
   Follow Me On Facebook!
   Follow Me On Pinterest!

Tuesday, February 24, 2015

Tried & True Tips for Tuesday!

How does a week go by but it feels like months or even as though it never happened? I cannot believe that a week ago we were out of town without a care in the world. Coming back always seems to take too much effort, do you ever realize that? It's as though my brain is still on siesta mode. My husband has been texting me so much yesterday and today about how much he misses me and asks how the kids are, that I think it is hitting him too. He usually averages 4 texts a day, but this week has been so much more already!
Today, I am sharing some of my favorite tips with you. My kids absolutely love Search & Find books, but wish they could cross off what they find, so they could stop and take a break if need be. A simple transparancy does the trick! I slip one over the page and they use a dry-erase marker to keep track of everything. Once they are through, just wipe it down and move it to the next page
Transparancies strike again! Each child has a subject file folder, where they keep their notes, loose worksheets and any other information I need to pass on to them for that subject. Stapling on a transparancy to the back of each page allows us to use it for quizzes, quick notes and games. It saves us paper and can be used over and over again!
You can find awesome fact-a-day calendars for around 1 dollar right now and NOW is the time to buy them! We buy them now, based on the facts and use the facts like flashcards for learning or fun fact of the day. They don't have to be done in the right order or on a certain date, the information is good for any day and this Historical Events one is perfect for our Fact-of-the-Day for History. What a fun way to begin each subject. After we read it, I cut off the date portion and just slip them into a folder, this way I can band them togethether when we are done with them and pass them along to a new family! Do this for younger students with colorful calendars that have beautiful pictures and you can use them for art work and collages. Cut out the Months and Days of the Week and laminate them and you have instant flashcards for an ordering game. Cut out 1 month of calendar squares numbered 1-31 and you have flashcards for counting, skip counting, adding, subtracting...you get creative!
Enjoy every minute my friends!
Photobucket
   Follow Me On Facebook!
   Follow Me On Pinterest!

Monday, February 23, 2015

In the Library and the Kitchen

Today is a very hands on day in the classroom, we are crafting with clay, building with bricks and so much more. I find the kids get so much more out of using their hands and heads instead of just using their head. I really need to cut the clutter in our classroom this Spring, but it truly feels as though we use it all. Oh the dilemma's of a homeschooler. 
For new book Monday, I will share what is in our new book basket and headed onto our shelves*:
1.With Jesus Always- My Mass & Reconciliation Double Sided book
2.A Christmas Treasury 12 Unforgettable Holiday Stories
(I like to pick up Christmas & Holiday books at big sales & clearance prices so that they are ready for next Christmas when Charlie our Elf brings the Christmas books on arrival!)
3.Meet the Monsters
4. The Offical Ninjago Guide
5. The Ordinary of the Mass in 8 Languages
6. Lord I give You This Day
7. The Barnes & Noble Guide to Children's Books
8. Art & History of Pompeii
9. Sarah Laughs
10. The Stable Where Jesus Was Born
(another Christmas find)
11. The All-Time Awesome Bible Search
12. Sammy's Fantastic Journeys with the Early Heroes of the Bible
13. The Middle Ages
14. Journey to the Center of the Earth Graphic classic
15. New Junior Cookbook
(My son is taking a cooking class and I wanted something that he can easily follow along with at home and begin getting even more comfortable in the kitchen)
16. Human body
17. The Lewis & Clark Expedition
(I needed something to go with a game that I downloaded and will share later this week!)
As the school year progesses, it seem that the shelves just want to explode and this is AFTER hosting a book swap! Time to host another one it seems! Anyway, on to our menu plan for monday!

Monday's are tough for us because the kids have classes from 3-5, then we pick up dad so he can join the evening activities, and then one more class from 6-7:30, this means we have to eat something quick in the car on our way to the final lesson. This monday evening class is only every other week, so that is a bonus. On this day, I have to have something portable that we can enjoy in the car or in the lunchroom at the final class. (I don't like feeding the kids dinner too late as it messes with their sleep cycle too much)

Monday - DIY Sandwich Bar with toppings & Cucumber Spears with Salt & Lime
Tuesday - Basil-Pesto Gnocci served over a bed of Sauteed Spinach and a Cucumber,Tomato & Vidalia Onion Salad
Wednesday- Broccoli Cheese Crockpot Soup served with Fresh baked bread & Avacado Salad
Thursday-Crockpot Cilantro Lime Chicken Tacos with Rice served with  Build Your Own Garden Salad that can also be used as taco toppings
Friday- Out to dinner for Dad's Birthday!
Saturday- Out to dinner with friends
Sunday - Pork Roast with Potates, Carrots & Green Beans, Served with a Greek Salad
Enjoy every minute my friends!

Follow Michelle's board Fun with Food ♨ on Pinterest.
All of my recipes can be found on my Fun with Food board on Pinterest

Photobucket

   Follow Me On Facebook!
   Follow Me On Pinterest!

Sunday, February 22, 2015

In This Moment...

In this moment I am...
~Sipping Tea with my husband
~Listening to little voices that should be asleep
~Fighting a headache that seems to want to make an appearance
~Putting together school work for tomorrow
~Trying to stretch the weekend for a bit longer
~Debating on whether or not to watch a movie tonight
~Wishing that my kids were not getting older every day
~Smelling the mopping solution in the air
~Wanting dessert but settling for an apple slice
~Hoping that in everything I do, I am doing it well
Enjoy every minute my friends.
Photobucket
I have often been asked about all of my quotes, you can find the ones I use in my blog here:
Follow Michelle's board Words of Wisdom ✉ on Pinterest.
    Follow Me On Facebook!
   Follow Me On Pinterest!

Sunday School Post #4

Happy Lent my friends! How is it going so far? I apologize for the jumbo size of this post as we were out of town last week and I didn't feel like leaving my snuggly hotel bed to write a new post. 
Church is one of the things we never let get in the way of going on vacation. We love visitng new churches and meeting new people. Before we head out of town, if we are gone on a holy day of obligation or a Sunday, we research for the nearest church. We have discovered so many quaint churches, incredible and jaw dropping places and some that are so full of love that you want to move there right away! St. Cecilia's, pictured here, was where we spent our Ash Wednesday and it was truly one of those places where you felt right at home with everyone. The priest was amazing to listen to and I was inspired by his homily. He handed out crosses to everyone in the sanctuary so that they could keep them in their pockets and rub them in times of stress or happiness as a reminder to always know God is there.
All of our Easter books are out and we enjoy reading one every other day, during the weeks of Lent.
Picking up some new books for this year to go along with our Liturgical Calendar from Illuminated Ink. I love visiting our local Catholic Store, The Vineyard, for fun things to keep the kids involved in our Lenten Journey.
These booklets are perfect for our daily reflection. We use one at breakfast, one at lunch and one at dinner along with one at the start of our classroom day. They just break Lent down 1 day at a time with a brief reflection, story and prayer.
I also have packets of Lenten printouts that I found throughout pinterest. I have put them into folders for the kids and we work on a few things each day. I printed them all up in black and white, so that we can highlight and color as we go, to personalize them. Check out what I have pinned (activity-wise) for Lent HERE. Here is what I have pinned as far as meatless meals for LENT HERE!  We have cut our regular religion class in half for these 40 days, so that we can focus on just studying for Lent as well.
Our classroom cross is on one wall with a small plaque under it and cup hooks hold rosaries, so that they are always accessible to everyone and this way they do not get tangled. 
During our reflection or activity time, I have been playing the Easter Story on CD.  One activitiy that we worked on for the beginning of Lent was a DIY Paper Bag book. This was so much fun to put together and the kids had a blast doing it while learning. We enjoy doing the living stations as well as just doing them on our own when we go to church. Instructions on how to make your own tabbed book are HERE! We put one station on each page, using the tabbed pull pages for the prayer that goes with each station. I just found the sheets with the station information on pinterest and google image searches and printed them out. The kids each made their own books, glued, cut and colored all done by them. These are great books that make it easy to follow along with. They have already gotten many compliments on them.
My husband and I are on Day #5 of the Love Dare and the Love Dare for Parents. It has been a great and humbling experience. We are learning new ways of communicating along with growing closer together.
One thing I have LOVED about the kids doing their own envelopes for church, which I discussed HERE, is that the kids get their good deeds published in the bulletin the following week. It really makes them stop and think about what they are sharing when they turn in their givings, not just write something quickly. Last week my children wrote:
#1 - Prayed for unborn babies
#2 - Helped a friend
#3 - Helped my brother
Enjoy every minute my friends!

Follow Michelle's board Catholic Homeschool on Pinterest.
Everything I post that is related to our Little Catholic Homeschool, can be found on the board above, I also like to pin items that I hope to incorporate into our lessons in the near future.
For a full listing of my other Sunday School Posts and general Catholic activities, visit HERE!

Photobucket
   Follow Me On Facebook!
   Follow Me On Pinterest!

Saturday, February 21, 2015

Super Saturday

Yay for the weekend, right?! I get so excited for weekends, then I realize that they are 100 times busier than the week. One thing I like to save are those plastic bags that linens come in, we use them for everything around here! Mainly, I like to use them to toss craft supplies in that I keep in the car. This makes them portable for car trips and when we run into places
Our living room furniture has been shuffled around to make room for a First Lego League board for competition. We put the frame for now, until our son's team decides on the layout and then we will make a replica. The perimeter helps him program his bot as he works out different ideas, so that he can bring his ideas to the meetings.
Pesto is one of my favorite things to eat and make, it's so simple and adds so much flavor! Here is my recipe:
2 cloves of garlic
2 cups of fresh basil leaves
1/2 cup of romano cheese (grated)
1/2 cup of olive oil
1/2 cup of spinach leaves
Dash of salt and pepper
Pop them all into the food processor and mix it up until it reaches your desired consistency. I used it to place over chicken breasts. If you score the breasts on both sides and then place the dollop on top it will soak into the chicken while cooking and keep the moisture in. Halfway through cooking time, flip them over and add a fresh dollop of pesto and finish cooking. Best.Chicken.EVER! Serve it with a Tomato, Cucumber and Vidalia Onion Salad with a sign of broccolini and this is a family fave. Bake your chicken based on the thickness of the breast, I do mine at 450* for 20 minutes (10 on each side).

                              Follow Michelle's board Fun with Food ♨ on Pinterest.
On Pinterest, I post my own personal recipes along with any that I want to try. If you ever see me post a meal on my menu planner, it is always posted above or the recipe will be posted soon!
Enjoy every minute my friends!

Photobucket
   Follow Me On Facebook!
   Follow Me On Pinterest!

Friday, February 20, 2015

Fossil Friday!

It's Fossil Friday in the school room and I wanted to share with you what we all did for our fossil lesson with our homeschool group. The kids got to dig for dinosaur bones from a plaster of paris brick with pick tools and a hammer.
These are real fossil specimens given to us by the Burpee Museum of Natural History. Educators have an awesome opportunity to borrow learning boxes from the museum for a small fee and they are an awesome way to get our group together learn.
Due to booking issues with our local library, I decided to host this event in our home. Knwing we had a fairly large group coming, I decided to create stations, so that the kids were not restricted to their tables and the activities could be spread about. I also raided our classroom library for as many books on Fossils, minerals and rocks we could find and used those to decorate the space.
I had 3 tables set up with a booklet we would all be making and I spread the fossils throughout the tables, to encourage them to move from table to table. Each table had a variety of craft supplies, so they would only have to share with their table and not the entire room.
Using the awesome TOOBs from Safari Ltd., I made up these awesome checklists that you can get HERE (Print and laminate them to use over and over again)and then I dumped the TOOBS in bins and covered them in rice. This alone makes a fantastic sensory bin, but when paired with a magnifying glass, brush and checklist, it becomes a hunt to learn. They were told to dig for one, match it to the list and read the name and then check it off. 
Using a Google search, I came across this Types of Rock sheet, but it was afrom a pay site for the entire activity and as I was doing this on my own dime with a small fee to pay for the box from the group, I decided to keep hunting. I used the cover sheet and shrunk it down to fit 4 per page, so that I would not waste that much ink and paper and then did the same for the definitions. Add them to paper for a longer backgroun and they were fun and easy to make! It was a great event after everything!
Enjoy every minute my friends!

Photobucket
   Follow Me On Facebook!
   Follow Me On Pinterest!
Related Posts Plugin for WordPress, Blogger...